How to Install Plugins for WordPress Website
Summary: A plugin is a software containing a group of functions that can be added to a Wordpress website. This article will show you how to install plugins to extend the functionality of your websites.
Table of Contents:
Create a WordPress Website
Log in to the WordPress Admin Area
Install Plugins
Table of Contents:
1. Create a WordPress Website
Before you add a theme, please make sure you have created your WordPress website on our platform.
2. Log in to the WordPress Admin Area
See how you can get the credentials on the Site & SSL page in the Control Panel and log in to WordPress Admin Panel.
3. Install plugins
There are 2 ways to install WordPress plugins.
3.1 Automatic Plugin Installation
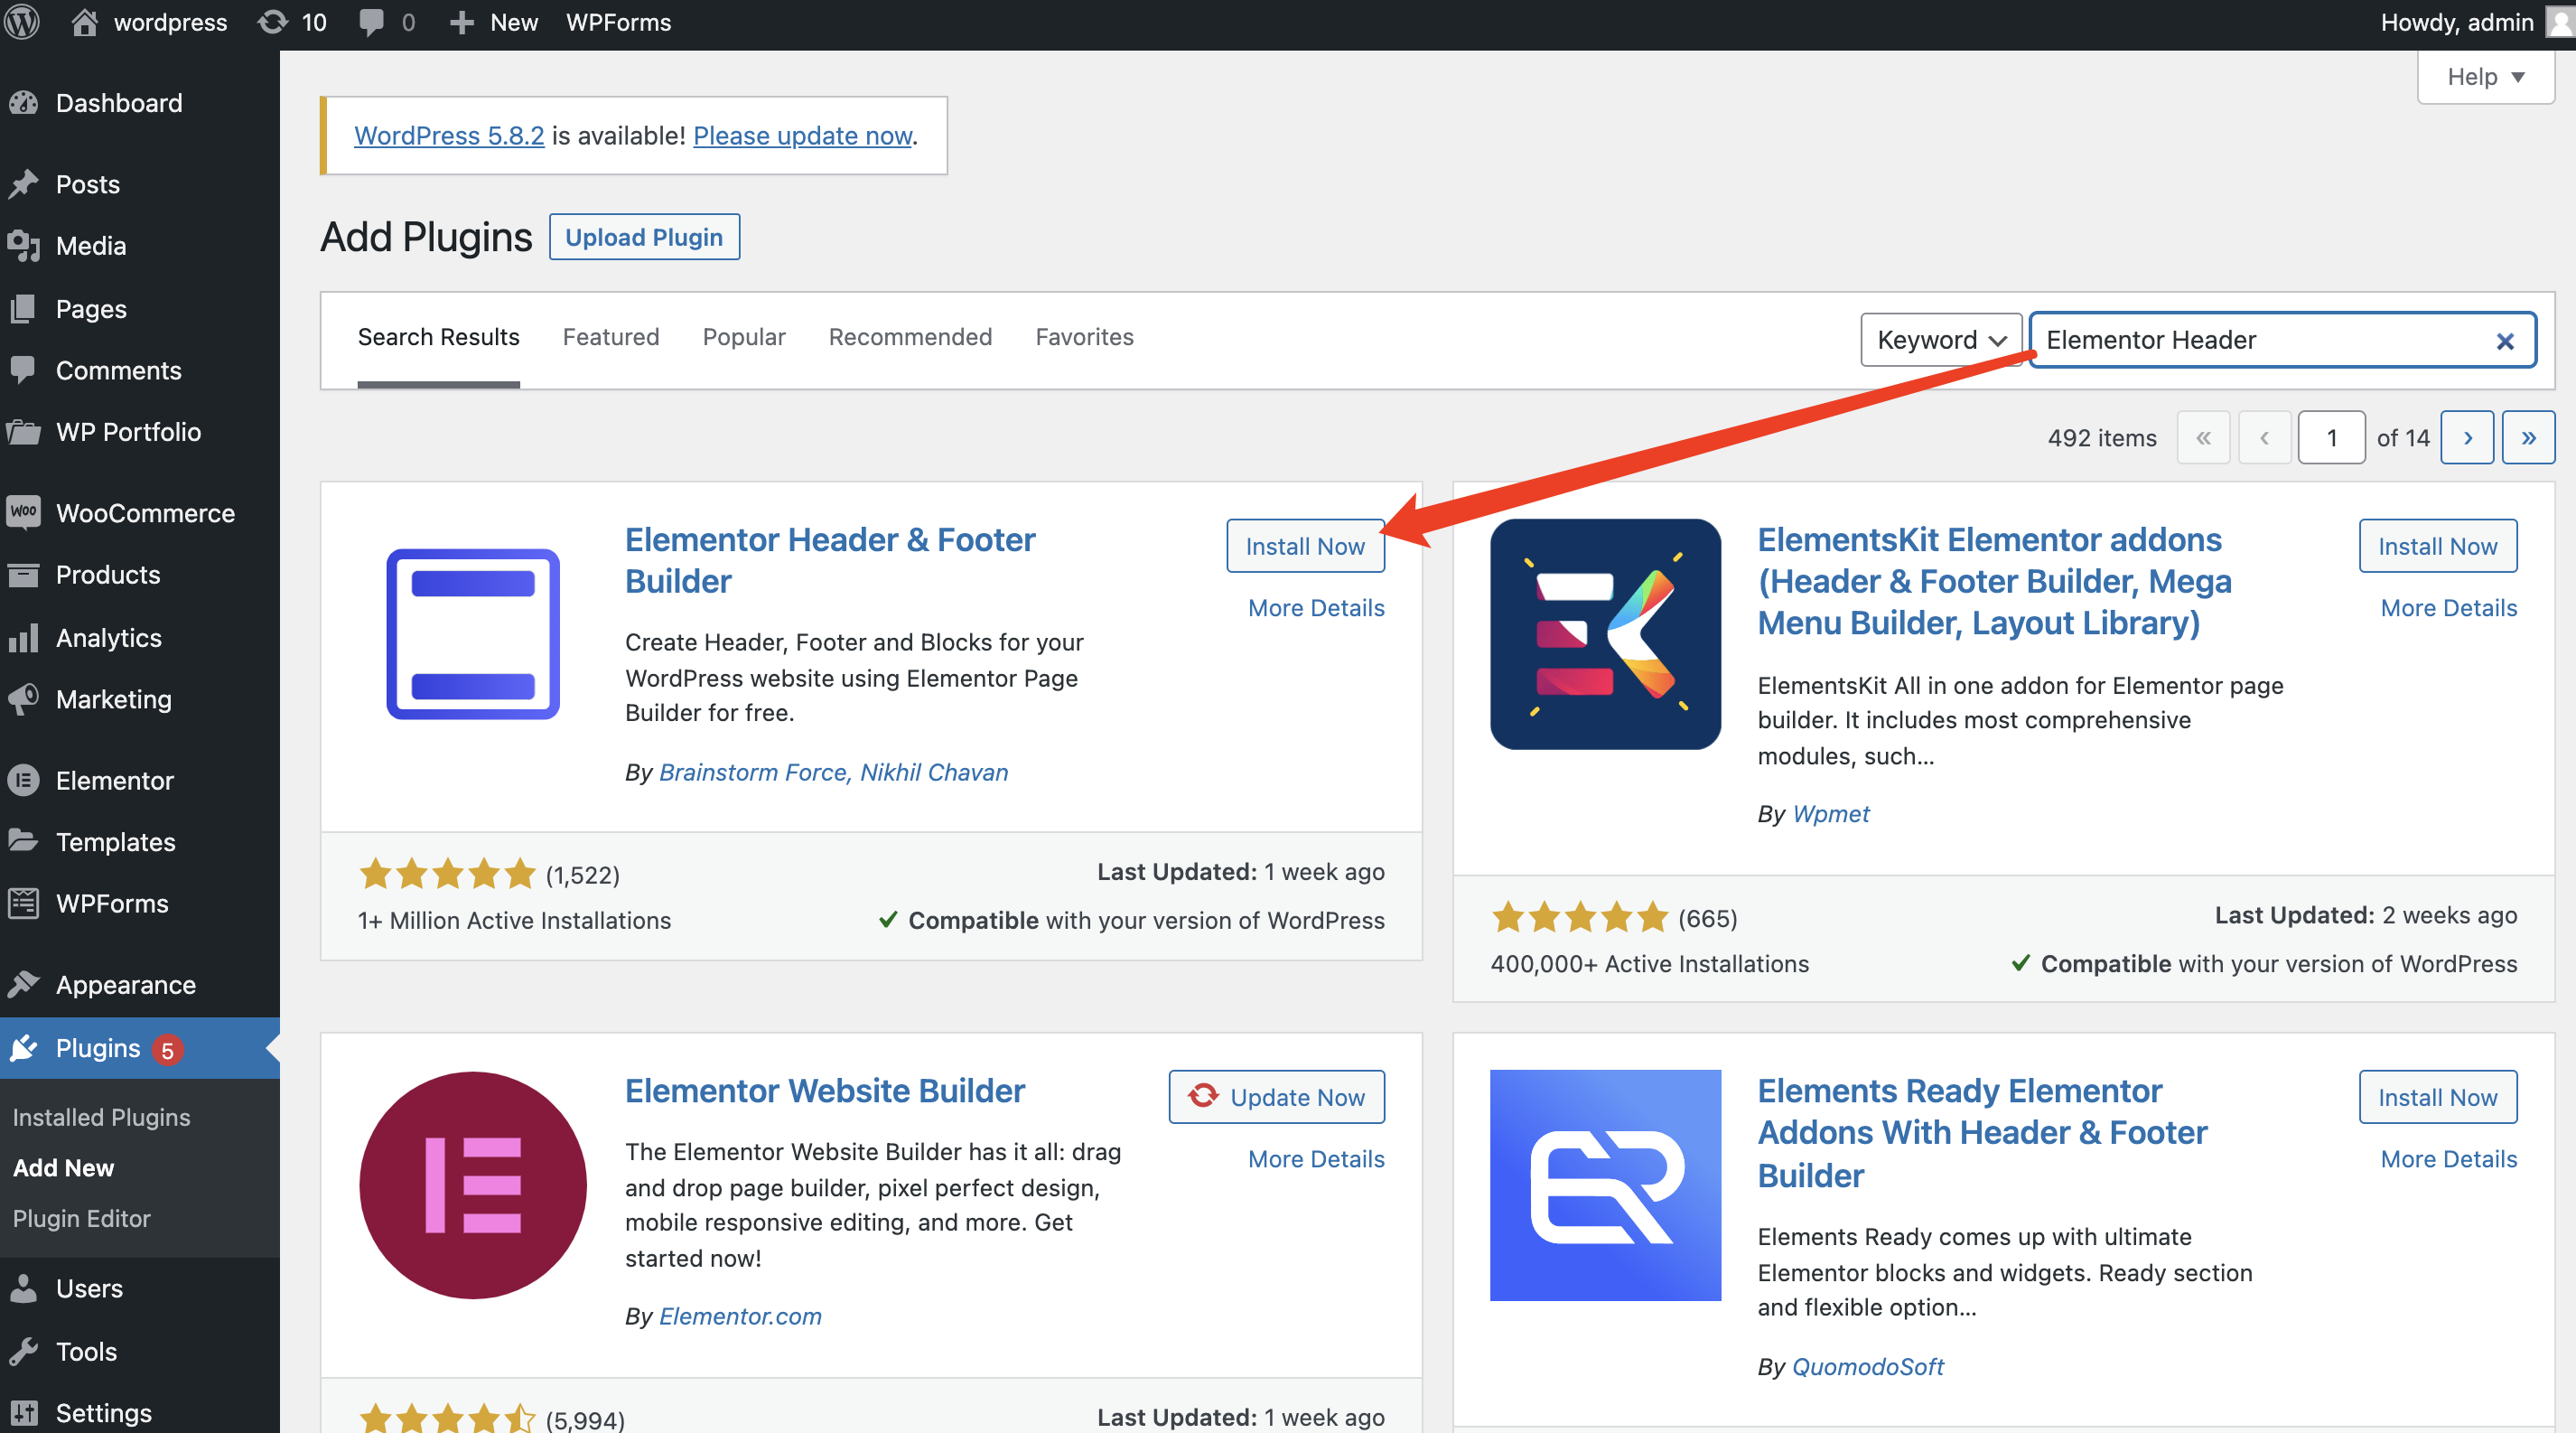
Any plugin available on the WordPress Plugins Directory can be installed via the built-in plugin installer.
- Navigate to Plugins > Add New.
- Use the search form in the top-right to search by keyword, author or tag.
- On the search results that appear, click a plugin’s title to read more about it. This page may contain installation notes, plugin documentation or other useful information.
- Click the Install Now button to install the plugin.
- Click Activate to activate the plugin.

3.2 Manual Upload via WordPress Admin
If you have a copy of the plugin as a zip file, you can manually upload it and install it through the Plugins admin screen.
- Navigate to Plugins > Add New.
- Click the Upload Plugin button at the top of the screen.
- Select the zip file from your local filesystem.
- Click the Install Now button. When installation is complete, you’ll see “Plugin installed successfully.”
- Click the Activate Plugin button at the bottom of the page.
